Replacing the blade on your Cub Cadet mower is essential for maintaining cutting performance and safety. Regular blade replacement ensures a clean cut, promotes lawn health, and prevents accidents from dull or damaged blades.
1.1 Importance of Regular Blade Replacement
Regular blade replacement is crucial for maintaining optimal performance and safety of your Cub Cadet mower. Dull or damaged blades can tear grass, leaving it vulnerable to disease and pests. Sharp blades ensure a clean cut, promoting healthy lawn growth. Additionally, worn-out blades may cause uneven cutting, reducing the mower’s efficiency. Replacing blades also prevents potential damage to the mower deck from bent or rusted edges. Safety is another key factor, as dull blades can throw debris more forcefully, increasing accident risks. By replacing blades regularly, you maintain your mower’s effectiveness, protect your lawn, and ensure safer operation. This simple maintenance step is essential for long-term mower reliability and lawn care quality.
1.2 Overview of the Process
Replacing the blade on your Cub Cadet mower involves a systematic approach to ensure safety and efficiency. The process begins with preparation, including disconnecting the spark plug and securing the mower on a level surface. Next, the mower deck must be accessed and removed to expose the blade. Once removed, the blade can be loosened using a socket wrench and replaced with a new one. After installation, the deck is reattached, and all components are reconnected. Finally, a test run is performed to ensure proper function. This step-by-step method ensures a smooth and safe blade replacement process, maintaining your mower’s performance and longevity. Proper tools and adherence to safety guidelines are essential throughout the procedure;
Preparation for Blade Replacement
Ensure your Cub Cadet mower is ready for blade replacement by gathering tools, disconnecting the spark plug, and securing the mower on a level surface for safety.
2.1 Safety Precautions
Before starting the blade replacement process, ensure your safety by disconnecting the spark plug to prevent accidental engine start-up. Wear protective gloves and eyewear to avoid injuries from sharp blade edges or debris. Place the mower on a flat, stable surface and engage the parking brake if available. Allow the engine and mower deck to cool completely to prevent burns. Never reach under the mower deck with the engine running or while the blade is moving. Keep children and pets away from the work area. Properly secure the mower deck to prevent it from shifting during maintenance. Always follow the manufacturer’s guidelines for safe blade replacement.
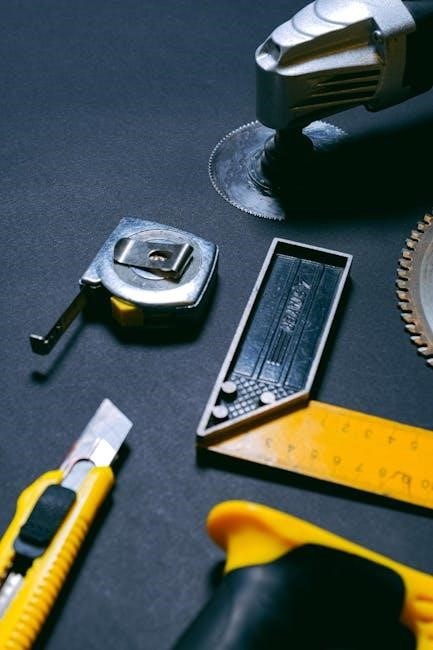
2.2 Tools and Materials Needed
To replace the blade on your Cub Cadet mower, gather the necessary tools and materials to ensure a smooth process. You will need a 15/16-inch socket or wrench to loosen the blade nuts, as well as a pair of gloves for hand protection. Additional tools include a screwdriver for removing deck components and a torque wrench for securing the new blade. Materials required include a new high-quality mower blade designed for your specific Cub Cadet model, a small amount of grease for lubricating bolts, and a cleaning brush to remove debris from the mower deck. Always refer to your Cub Cadet manual for model-specific tool requirements.

Removing the Mower Deck
Lower the mower deck to its lowest setting and remove the belt covers. Disconnect the belts and deck pins to safely detach the deck from the mower.
3.1 Accessing the Mower Deck
To access the mower deck, ensure the mower is on a level surface and the engine is off. Disconnect the spark plug ignition wire for safety. Raise the mower deck to its highest position or lower it, depending on your model, to access the blades. Remove any protective covers or shields to expose the blades and deck components. For zero-turn models, you may need to remove the footrest or other obstructions. Once accessible, you can proceed to remove the deck for blade replacement. Always refer to your specific Cub Cadet model’s instructions for precise steps.
3.2 Detaching the Deck from the Mower
To detach the mower deck, locate the deck pins or bolts that secure it to the mower. Use a wrench or socket to remove these fasteners. For some models, you may need to remove cotter pins first. Gently lift the deck off the mower, taking care not to damage any belts or pulleys. If the deck is heavy, consider enlisting help or using a jack to support it. Once removed, place the deck on a stable surface for blade replacement. Ensure the mower remains secure and stable throughout the process to avoid accidents. Always refer to your Cub Cadet model’s manual for specific detachment instructions.

Removing and Replacing the Blade
Loosen the blade nuts using a 15/16-inch socket. Remove the old blade and inspect the deck for debris; Install the new blade securely, ensuring proper orientation for optimal performance.
4.1 Loosening and Removing the Blade
To begin, locate the blade nuts securing the mower blade. Use a 15/16-inch socket or wrench to loosen these nuts. Turn them counterclockwise until they are completely removed. Carefully lift the blade off the mower deck, ensuring it is free from any remaining fasteners. Handle the blade with caution, as it may still be sharp. If the blade is stuck, gently rock it back and forth to dislodge it. Once removed, inspect the area for any debris or obstructions. This step is crucial for a smooth blade replacement process.
4.2 Inspecting and Cleaning the Deck
After removing the blade, inspect the mower deck for any debris, dirt, or damage. Use gloves and a wire brush to clean out grass clippings and dust from the deck surfaces. Check for rust or corrosion and address it promptly to prevent further damage. Ensure all bolt holes and mounting points are clear and undamaged. A clean deck ensures proper blade installation and optimal mowing performance. This step is vital for maintaining your mower’s efficiency and longevity, ensuring the new blade operates effectively and safely.
4.3 Installing the New Blade
Install the new blade by aligning it with the mounting bolts on the mower deck. Ensure the blade is properly seated and oriented correctly, with the “Bottom” label facing downward. Secure the blade using the provided nuts, tightening them in a star pattern to ensure even pressure. Use a wrench or socket to tighten the nuts to the recommended torque specification. Double-check that the blade is firmly in place and does not move excessively. Finally, inspect the blade for proper alignment and balance before proceeding. A correctly installed blade ensures safe and efficient mowing performance.
Reassembling the Mower
Reattach the mower deck by aligning it with the tractor and securing it with the previously removed pins and bolts. Reconnect the drive belt and ensure all components are properly aligned and tightened. Double-check that all safety features and connections are restored before starting the mower. This step ensures the mower operates safely and efficiently.
5.1 Reattaching the Mower Deck
After replacing the blade, carefully position the mower deck back onto the tractor. Align the deck pins with the mounting brackets on the mower. Secure the deck using the bolts or pins you removed earlier, tightening them firmly to ensure stability. Reconnect the drive belt to the mower deck pulley, making sure it is properly seated and aligned. Double-check that all connections are secure and that the deck is level. Tighten all bolts and nuts to the manufacturer’s specified torque to prevent vibration or instability during operation. Finally, ensure the mower deck is correctly engaged with the tractor’s chassis for optimal performance and safety.

5.2 Reconnecting the Belt and Other Components
Once the mower deck is securely reattached, reconnect the drive belt to the tractor’s engine pulley. Ensure the belt is properly aligned and seated in the pulleys to maintain correct tension. Reattach any additional components, such as belt covers or guards, to protect the belt from debris. Check the belt tension by gently pressing on it; it should have some give but not be overly loose. If necessary, adjust the idler pulley to achieve the correct tension. Finally, reconnect any electrical or hydraulic connections that were disconnected during the process. Test the mower’s functionality by engaging the blades and ensuring smooth operation before mowing.

Testing the Mower
Start the mower and perform a test run to ensure smooth operation. Check blade rotation and alignment, verifying even cutting performance and proper belt function.

6.1 Performing a Test Run
After reassembling your Cub Cadet mower, perform a test run to ensure proper function. Start the engine and let it run for a few minutes to warm up. Check for unusual noises or vibrations, which could indicate improper blade installation or misalignment. Ensure the mower deck is at the correct height and the blades are spinning evenly. Test the mower on a small area of grass to observe cutting performance. Verify that the blades are cutting cleanly and consistently without leaving uncut patches. If any issues arise, stop the mower immediately and inspect the blades and deck for adjustments or tightening. This step ensures safety and optimal performance.
6.2 Checking Blade Performance

After the test run, inspect the blade’s performance to ensure optimal cutting. Check for even grass cutting and consistent discharge of clippings. Verify that the blade is spinning correctly without wobbling or misalignment. Inspect the mower deck for proper blade engagement and ensure no debris is obstructing the flow. If the blade is not cutting evenly, adjust the deck leveling or check for blade damage. Ensure the blade is securely fastened and properly aligned with the mower deck. A well-performing blade will leave your lawn looking clean and evenly manicured, confirming a successful replacement. Proper blade performance is crucial for both lawn health and mower efficiency.