A sewing machine laser guide projects a light beam for accurate stitching, enhancing precision and efficiency. Ideal for straight lines and various fabrics, it’s cost-effective and user-friendly.
What is a Sewing Machine Laser Guide?
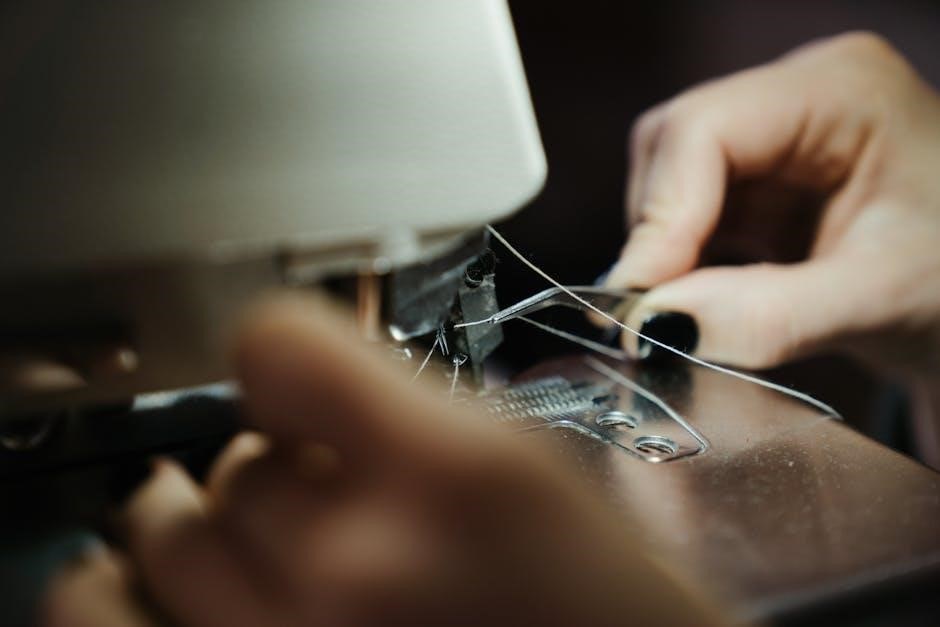
A sewing machine laser guide is a tool that projects a beam of light to help sewists achieve precise, straight stitches. It is designed to align with the machine’s needle or presser foot, providing a clear visual reference for fabric placement. This accessory is particularly useful for maintaining consistent seam allowances and sewing straight lines effortlessly. The laser guide is often red or another visible color, making it easy to see on various fabrics. It is a cost-effective solution for enhancing accuracy and is compatible with both manual and computerized sewing machines. Many users find it invaluable for projects requiring exact alignment, such as quilting or appliqué.
Why Use a Laser Guide for Sewing?
Using a laser guide for sewing offers numerous benefits, primarily enhancing precision and efficiency. It provides a clear, visible line to follow, ensuring straight stitches and consistent seam allowances. This tool is especially useful for intricate projects like quilting or appliqué, where accuracy is crucial. The laser guide reduces the need for manual marking, saving time and minimizing errors. It is also versatile, working well with various fabric types and thicknesses. Additionally, it is easy to operate, with simple on/off controls, making it a practical addition for sewists of all skill levels, from beginners to professionals.
Benefits of a Sewing Machine Laser Guide
A sewing machine laser guide enhances stitching quality, saves time, and boosts efficiency. It works seamlessly with various fabrics, providing clear visibility and consistent results, making it a valuable tool for sewists.
Improved Precision and Accuracy
A sewing machine laser guide significantly enhances stitching accuracy by projecting a clear light beam. This feature ensures straight lines and consistent seam allowances, reducing human error. It’s particularly useful for intricate patterns and quilting, where precision is crucial. The laser’s visibility on various fabrics, including light-colored materials, allows for flawless alignment. Adjusting the laser’s position ensures it adapts to different fabric thicknesses, maintaining accuracy. This tool is especially beneficial for appliqué placement and half-square triangles, enabling precise cuts and stitches. By minimizing deviations, it helps achieve professional-quality results effortlessly, making it an indispensable asset for both beginners and experienced sewists.
Time-Saving for Straight Stitching
The laser guide on a sewing machine is a game-changer for straight stitching, saving time by eliminating the need for manual adjustments. By aligning the laser with the seam, users can maintain consistent stitching without constant monitoring. This feature is especially beneficial for long seams or repetitive projects, as it allows for uninterrupted workflow. The laser’s precision ensures even spacing, reducing the need for re-stitching. Whether sewing quilts, garments, or home decor, the laser guide streamlines the process, making straight stitching faster and more efficient. It’s a must-have tool for sewists aiming to complete projects quickly and effortlessly.
Enhanced Visibility for Various Fabrics
The laser guide’s bright, sharp light ensures clear visibility on diverse fabrics, from lightweight silks to heavy denim. This feature is particularly useful for materials with busy patterns or dark colors, where traditional guides may blend in. The laser’s precision illumination allows sewists to maintain accurate seam allowances without marking the fabric. For quilting or appliqué, where intricate designs are common, the laser’s clarity is unmatched, ensuring precise alignment every time. This adaptability makes the laser guide an indispensable tool for handling a wide range of fabrics with confidence and ease.

How to Use a Sewing Machine Laser Guide
Align the laser with your desired seam line for straight stitching. Adjust the guide as needed for fabric thickness and turn it on/off easily with a button.
Aligning the Laser with the Seam
Aligning the laser with the seam is straightforward. Place the laser guide alongside the desired seam line, ensuring it is parallel to the edge of the fabric. For precise results, align the laser with the right side of the 1/4-inch presser foot. This setup is ideal for maintaining consistent seams, especially for quilting or straight stitching. Adjust the laser position as needed for different fabric types or project requirements. Proper alignment ensures accurate stitching and professional-looking results, making it easier to follow the seam line without marking the fabric. This feature is particularly useful for complex patterns or thick materials.
Adjusting the Laser for Different Fabric Thicknesses
Adjusting the laser guide for various fabric thicknesses ensures optimal performance. For thicker fabrics, slightly move the laser back to account for the added bulk. Thinner fabrics may require the laser to be positioned closer to the needle. The red laser is particularly effective for light-colored materials, providing clear visibility without marking. For fabrics with a thickness of 3.5, adjust the laser accordingly to maintain precision. Calibration may be necessary for consistency across different fabrics. Ensure the laser remains stable, as vibration from the machine should not affect its position. Proper adjustment enhances accuracy and ensures even stitching for all fabric types.
Turning the Laser On and Off
Operating the laser guide is straightforward. Locate the button on the function panel and press it to activate the laser. The beam will project onto the fabric, guiding your stitches. To turn it off, simply press the button again. This feature allows you to conserve power when not in use. Ensure the laser is aligned with the seam before starting your project. Turning the laser on and off is quick and efficient, making it easy to integrate into your sewing routine. Proper usage ensures consistent results and prolongs the laser’s lifespan.
Maintenance and Troubleshooting
Ensure the laser remains aligned and secure to prevent shifting during use. Regularly clean the lens for optimal visibility and recalibrate as needed for consistent performance.
Calibrating the Laser for Consistency
Calibrating the laser ensures precise alignment with your sewing machine’s needle. Start by aligning the laser beam with the edge of the presser foot or seam guide. Use the adjustment buttons to fine-tune the laser’s position, ensuring it matches your desired seam line; Test the alignment by sewing a straight line on scrap fabric; If the laser shifts due to machine vibration, secure it firmly or adjust its mounting. Regular calibration maintains accuracy, especially after machine movements or fabric changes. This step is crucial for achieving consistent, professional results in your sewing projects.
Common Issues and Solutions
Some users report the laser shifting during sewing due to machine vibration. To fix this, ensure the laser is securely mounted or adjust its position after calibration. Another issue is visibility on dark fabrics; switch to a green laser for better contrast. If the laser beam appears uneven, check for dust or debris and clean the lens. For alignment problems, recalibrate the laser with the needle or presser foot. Finally, if the laser suddenly turns off, verify the power source or battery connection. Addressing these issues ensures optimal performance and consistent results.
Advanced Techniques with a Laser Guide
The laser guide enables precise alignment for techniques like half-square triangles and appliqué placement, ensuring accurate cuts and stitches. It enhances visibility for intricate designs and patterns.
Sewing Half-Square Triangles with Precision
Using a laser guide for half-square triangles ensures accuracy and alignment. Align the laser with the fabric edges or seam lines for consistent results. Place the fabric under the needle, ensuring the laser beam matches the desired seam allowance. Sew along the laser line, maintaining steady fabric movement. This method eliminates manual marking and guarantees precise corners. For two-at-a-time triangles, align the laser with the presser foot edge and sew diagonally. The laser’s visibility ensures flawless stitching, making it ideal for quilting and intricate patterns.
Using the Laser for Appliqué Placement

The laser guide simplifies appliqué placement by projecting a precise light onto fabric. Align the laser with the appliqué’s edge or desired position for accurate placement. This eliminates the need for manual markings. Place the appliqué under the needle, ensuring the laser beam aligns with the fabric’s edge. Begin sewing, following the laser line for consistent stitching. The laser’s visibility enhances accuracy, especially on light-colored fabrics. It’s ideal for intricate designs, ensuring perfectly positioned appliqué without additional tools or marking, streamlining your sewing process for professional results.

Choosing the Right Laser Guide for Your Sewing Machine
Select a laser guide that aligns with your machine’s compatibility and sewing needs. Consider visibility on various fabrics, ease of use, and cost-effectiveness for optimal results.
Key Features to Look For
When selecting a laser guide, prioritize visibility on various fabrics, especially light-colored materials. Opt for adjustable brightness and alignment features to ensure accuracy. Compatibility with your sewing machine model is crucial, including advanced models with CNC systems. Consider additional functionalities like a 360-degree machine head rotation for versatility. Durability and resistance to vibration are important to maintain consistency. Cost-effective options with easy installation and user-friendly controls are ideal. Ensure the laser guide enhances precision without marking fabrics, making it a practical tool for both beginners and experienced sewists.
Cost-Effective Options
For budget-friendly solutions, consider the Vivilux 3-in-1 rechargeable laser system, a popular choice among quilters and sewists. It offers precision at an affordable price. Red laser guides are another cost-effective option, ideal for light-colored fabrics, providing clear visibility without marking materials. Models like the Brother DreamWeaver with a red laser are durable and mid-range in cost, offering excellent value. When shopping, ensure compatibility with your sewing machine and read reviews to find the best fit for your needs, enhancing your sewing experience without breaking the bank.
The sewing machine laser guide is a transformative tool, offering precision, efficiency, and ease for sewists of all levels. Its cost-effectiveness and versatility make it a must-have accessory.
Final Thoughts on the Sewing Machine Laser Guide
The sewing machine laser guide is a valuable accessory that enhances sewing precision and efficiency. It provides clear visibility, especially on light fabrics, and is cost-effective. Users praise its ease of use, with a simple on/off button. The laser’s stability, despite machine vibrations, ensures consistent results. Perfect for straight stitching and maintaining seam allowances, it is versatile for various projects. Whether for beginners or experienced sewists, the laser guide is a practical addition to any sewing setup, offering both convenience and accuracy in every stitch.